Every year on the second Friday of July, National French Fry Day gives food lovers everywhere an excuse to celebrate one of the world’s most beloved side dishes. This year, that date falls on July 10, 2026—and whether you’re hosting a backyard cookout or simply craving something golden and crispy, there’s no better way to mark the occasion than with a batch of homemade fries made from scratch.
The gap between a limp, pale fry and a golden, crackling one isn’t luck—it’s technique. From selecting the right potato to nailing your oil temperature, a few deliberate steps are all that stand between you and the best fries you’ve ever made. Read on for everything you need to know.
Picking the Perfect Potato for Crispy Fries
Not all potatoes are created equal, and your choice will directly affect the final texture and flavor of your fries.
Russet vs. Yukon Gold: A French Fry Showdown
Russet potatoes are widely regarded as the gold standard for french fries—and for good reason. Their high starch and low moisture content produce the signature combination of a fluffy, tender interior and a shatteringly crispy exterior. This is the same variety used by most professional kitchens.
Yukon Gold potatoes are a popular alternative. They contain more moisture and deliver a creamier, denser result—closer to a roasted potato than a classic fry. They work, but if maximum crispiness is the goal, go with Russets every time.
Size and Shape: Achieving Uniformity
Cut your fries to a consistent thickness—about ¼ inch is ideal. Uneven cuts lead to uneven cooking: some pieces will be overdone while others remain underdone. Uniform fries cook evenly and look better on the plate. A french fry cutter makes this easier if you’re preparing large batches.
Mastering the Cut: Techniques for Ideal Fries
Straight Cut, Shoestring, or Wedge?
Your preferred cut style will influence both texture and cooking time:
- Straight cut – The classic all-rounder. Crispy on the outside, fluffy within.
- Shoestring – Thin and delicate with maximum crunch. These cook quickly and go soggy fast, so serve immediately.
- Wedge – Thick and hearty with a soft, potato-forward interior. Great for dipping.
Whichever style you choose, make sure each piece is roughly the same size before they hit the oil.
The Importance of Soaking: Starch Removal for Crispness
Once your potatoes are cut, rinse them under cold water for about one minute, then submerge them in a bowl of cold water for 10 minutes. This draws out excess surface starch—the primary culprit behind soft, gummy fries.
After soaking, drain and rinse again. You’ll likely notice the water has turned milky white from the starch. Dry the potato sticks thoroughly with a clean kitchen towel before cooking. Any residual moisture will cause oil to splatter and slow down browning.
Achieving Golden Perfection: Frying Methods Explored
Double-Frying for Ultimate Crispiness
The double-fry method is the single most effective technique for achieving restaurant-quality fries at home. Here’s how it works:
- First fry at 325°F for 5 minutes – This lower-temperature cook softens the interior without adding much color. Think of it as gently cooking the potato from the inside out.
- Rest on paper towels for 5 minutes – This rest period allows steam to escape, setting the stage for a crispier second fry.
- Second fry at 375°F for 2–3 minutes – The higher heat creates the golden, crispy exterior. Remove when the edges are deeply golden and immediately season while hot.
The choice of cooking fat matters just as much as the technique. Beef tallow and duck fat are exceptional options—both tolerate high heat with minimal oxidation and add incredible depth of flavor. Peanut oil is another solid choice. Avoid olive oil, as its smoke point is too low for deep frying.
Air Frying and Baking: Healthier Alternatives
Prefer to skip the deep fryer? An air fryer produces surprisingly crispy results with far less oil. Toss your soaked, dried fries lightly in oil, spread them in a single layer in the basket, and cook at around 375–400°F for 15–20 minutes, shaking halfway through. They won’t quite replicate the texture of double-fried fries, but they’re a genuinely satisfying alternative.
Baking is another option. Spread fries on a lightly oiled sheet pan at 425°F for 25–30 minutes, flipping once. This method works best with Russets and benefits from a light coat of oil and seasoning before going into the oven.
Elevating Your Fries: Seasoning and Dipping
Classic Salt and Pepper Combinations
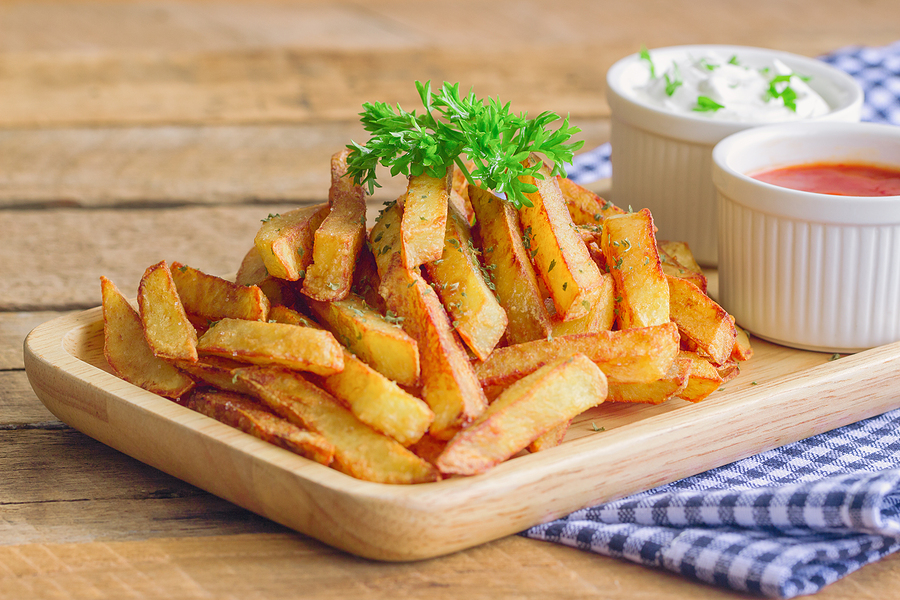
The golden rule: season your fries immediately after they come out of the oil, while they’re still hot. Salt sticks best to a hot surface. A generous pinch of flaky sea salt is all you need for a perfectly classic fry.
Add cracked black pepper for a simple upgrade, or try truffle salt for a more indulgent spin.
Herb Infusions and Spice Blends
Once you’ve mastered the basics, explore bold seasoning blends. Some favorites include:
- Cajun seasoning – A fiery, smoky blend of paprika, cayenne, garlic, and onion
- Garlic parmesan – Toss with garlic powder and grated parmesan straight from the fryer
- Smoked paprika and chipotle – For a rich, slightly smoky heat
- Old Bay – A Maryland classic that pairs especially well with thick-cut fries
- Herbs de Provence – Dried thyme, oregano, and basil for a fragrant, Mediterranean-style twist
Homemade Sauces to Complement Your Fries
A great dipping sauce can make good fries unforgettable. Classic ketchup or even ranch are always welcome, but consider making your own aioli (garlic mayonnaise), a spicy chipotle mayo, or a homemade nacho cheese sauce. For something tangy, try a jalapeño fry sauce made from mayo, ketchup, and pickled jalapeños.
Avoiding Soggy & Limp Fries: Common Pitfalls
Oil Temperature Control Is Key
Temperature is everything. Oil that’s too cool will absorb into the potato rather than sealing the surface, producing greasy, limp fries. Always use a kitchen thermometer. The target temperatures—325°F for the first fry and 375°F for the second—aren’t arbitrary. They reflect the science of how starches cook and how moisture escapes.
Don’t Overcrowd the Fryer
Adding too many fries at once drops the oil temperature rapidly, and when that happens, you get steam instead of a sear. Cook in small batches, giving each fry room to move freely in the oil. Patience here pays off in crunch.
Your French Fry Questions Answered
What’s the best oil for frying french fries?
Beef tallow and duck fat deliver the best flavor and crispiness, while also being stable at high heat. Peanut oil is an excellent neutral-flavored option. Avoid olive oil—its smoke point isn’t high enough for deep frying.
Can I make french fries ahead of time?
Yes. Complete the first fry at 325°F, then refrigerate the par-cooked fries overnight. When ready to serve, perform the second fry at 375°F. Alternatively, fully cooked fries can be frozen and reheated in a 375°F oven for about 10 minutes, or in an air fryer at 350°F for 5 minutes.
How do I make my fries extra crispy?
Soak your cut potatoes in cold water for at least 10 minutes, dry them completely, use the double-fry method, and fry in small batches at the correct temperature. Using beef tallow or duck fat instead of vegetable oil also significantly improves crispiness and helps the fries stay crispy longer.
Your Best Homemade Fries Are Just a Few Steps Away
Making truly great french fries at home takes a little more effort than simply dropping potatoes into hot oil, but the results are well worth it. Choose Russets, soak to remove starch, dry thoroughly, double-fry at the right temperatures, and season while hot. Follow those steps and National French Fry Day 2026 will be one worth remembering.
Planning a party or event this summer? Don’t stress about the food! Request an estimate today for our casual and formal catering services in Newnan and Peachtree City, Georgia—and let us handle the cooking while you enjoy the celebration.
Related Posts:
How to Make Your Outdoor Summer Event a Success
Bringing the Heat: Unique Catering Concepts for Summer Parties